Table of contents
- What is Git?
- Why Use Git?
- Getting Started with Git
- Basic Git Commands
- Branching and Merging
- Remote Repositories
- How to Pull Code from Git to Your System
- Using Git in Visual Studio Code (VS Code)
- Common Mistakes and How to Avoid Them
- Understanding Main and Master Branches
- Git vs GitHub: Understanding the Difference
- Best Practices
- Conclusion
Git is a distributed version control system that is widely used in software development for tracking changes in source code during software development. It helps developers collaborate on projects efficiently and keep track of every modification to the codebase. In this blog, we'll cover everything you need to know about Git, from the basics to advanced topics.
What is Git?
Git is a version control system created by Linus Torvalds in 2005. It allows multiple developers to work on a project simultaneously, track changes, and manage versions. Git is known for its speed, efficiency, and ability to handle large projects with multiple branches.
Why Use Git?
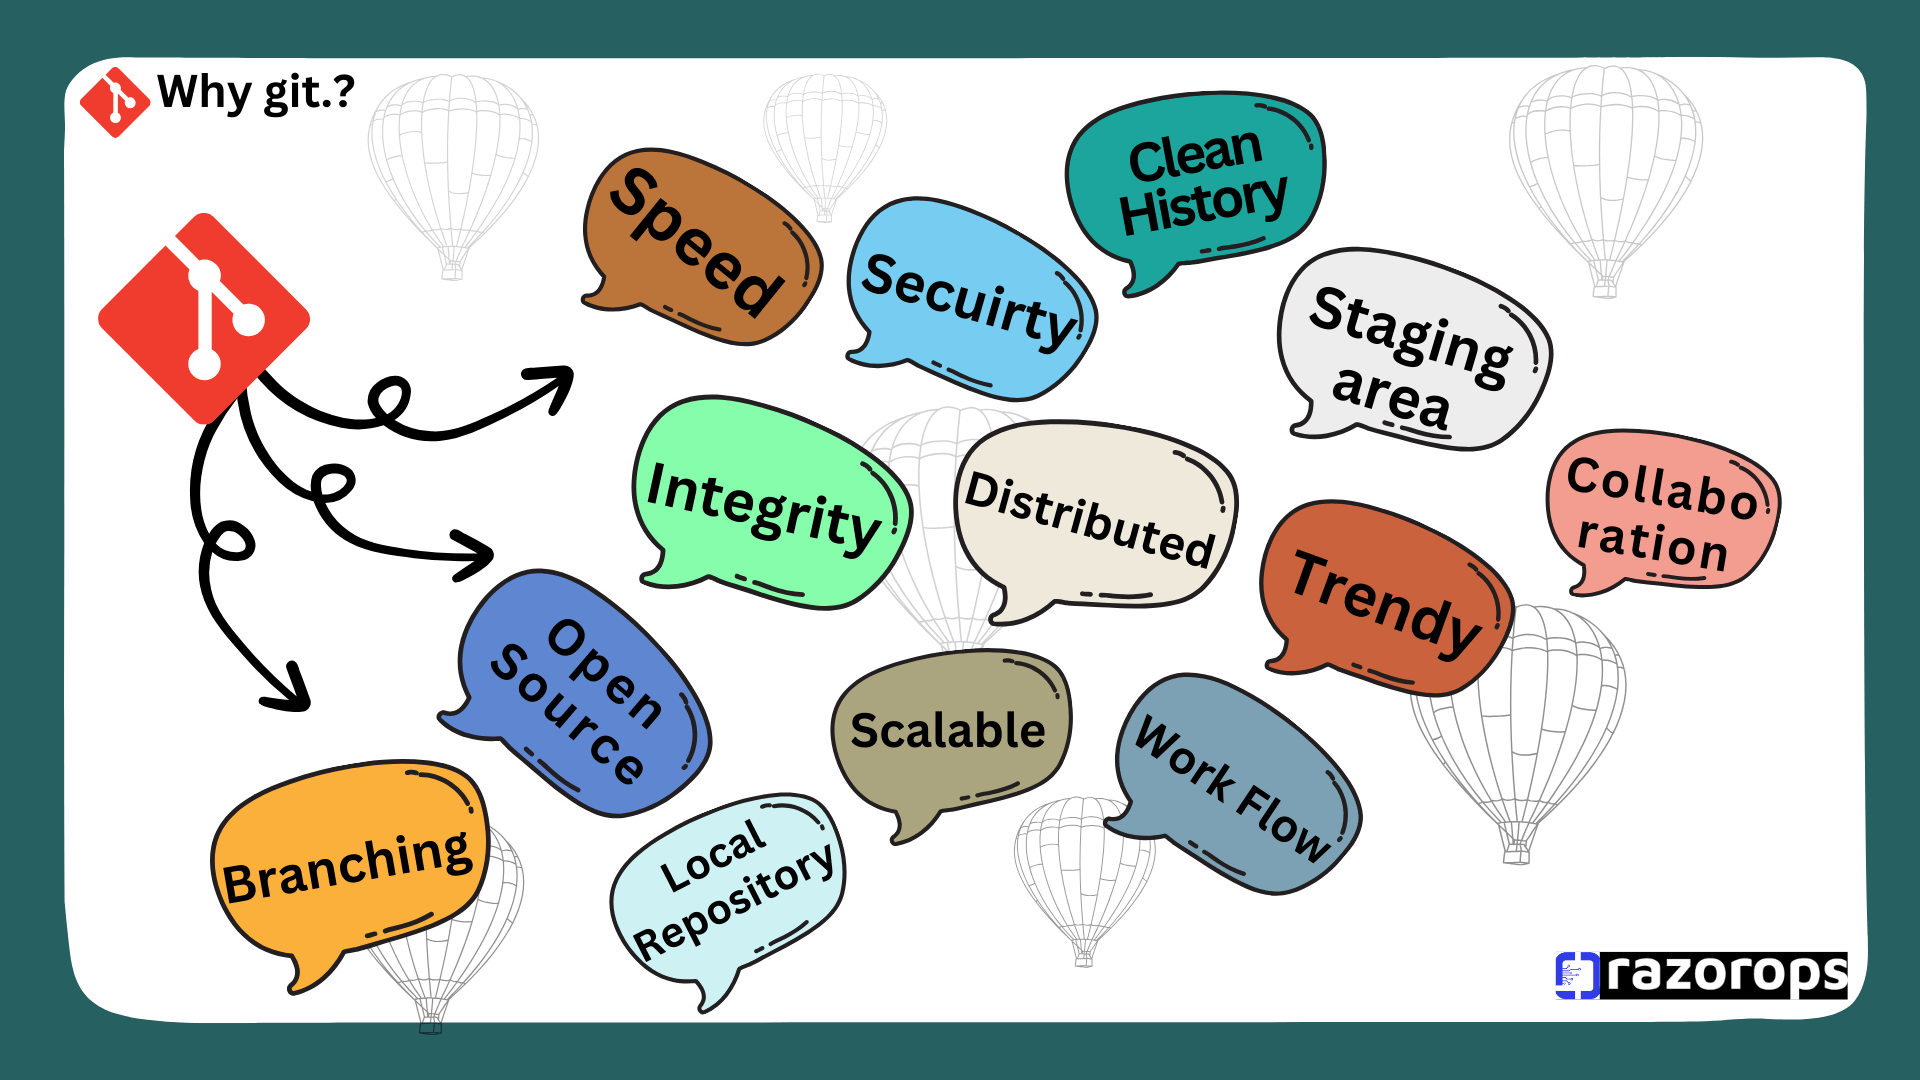
Collaboration: Multiple developers can work on the same project simultaneously.
History: Keeps a detailed history of every change made to the project.
Branching and Merging: Allows developers to create branches for new features and merge them back into the main codebase.
Backup: Acts as a backup by keeping a history of the entire project.
Getting Started with Git
Installing Git
To install Git, visit the Git website and download the appropriate version for your operating system. Follow the installation instructions for your platform.
Setting Up Git
After installing Git, you need to configure it with your name and email address. This information will be used in your commits:
git config --global user.name "Your Name"
git config --global user.email "your.email@example.com"
Initializing a Repository
To start using Git, you need to initialize a repository:
git init
This command creates a new Git repository in the current directory.
Cloning a Repository
If you want to contribute to an existing project, you can clone a repository:
git clone https://github.com/username/repository.git
This command creates a local copy of the repository on your machine.
Basic Git Commands
Checking the Status
To check the status of your repository, use:
git status
This command shows which files have been modified, which are staged for commit, and which are untracked.

Adding Changes
To add changes to the staging area, use:
git add <file>
To add all changes, use:
git add .
Committing Changes
To commit changes to the repository, use:
git commit -m "Your commit message"
A commit is a snapshot of your repository at a specific point in time.
Viewing Commit History
To view the commit history, use:
git log
This command shows a list of all commits in the repository.
Branching and Merging
Creating a Branch
To create a new branch, use:
git branch <branch-name>
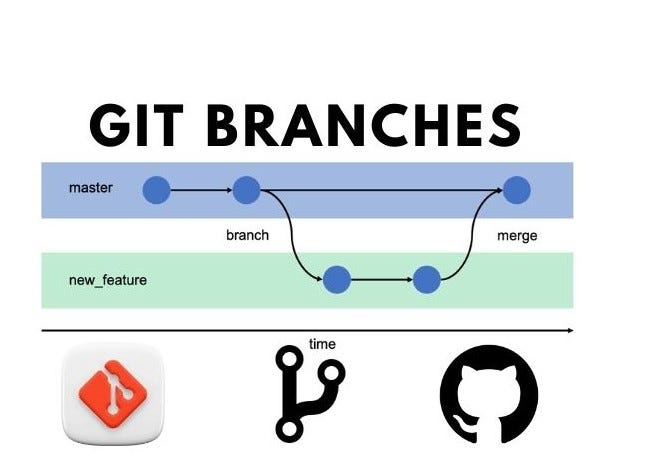
Branches allow you to work on different parts of a project simultaneously. For example, you can create a branch for a new feature without affecting the main codebase.
Switching Branches
To switch to a different branch, use:
git checkout <branch-name>
This command moves you to the specified branch.

Merging Branches
To merge a branch into the current branch, use:
git merge <branch-name>
Merging incorporates changes from one branch into another. It is typically used to integrate feature branches into the main branch.
Rebasing Branches
Rebasing is another way to integrate changes from one branch into another. Instead of merging, rebasing rewrites the commit history. To rebase a branch, use:
git rebase <branch-name>
Rebasing is useful for keeping a linear project history. However, it can be more complex than merging and should be used carefully.
Deleting a Branch
To delete a branch, use:
git branch -d <branch-name>
Deleting branches that are no longer needed helps keep your repository clean.
Remote Repositories
Adding a Remote Repository
To add a remote repository, use
git remote add origin https://github.com/username/repository.git
Pushing Changes
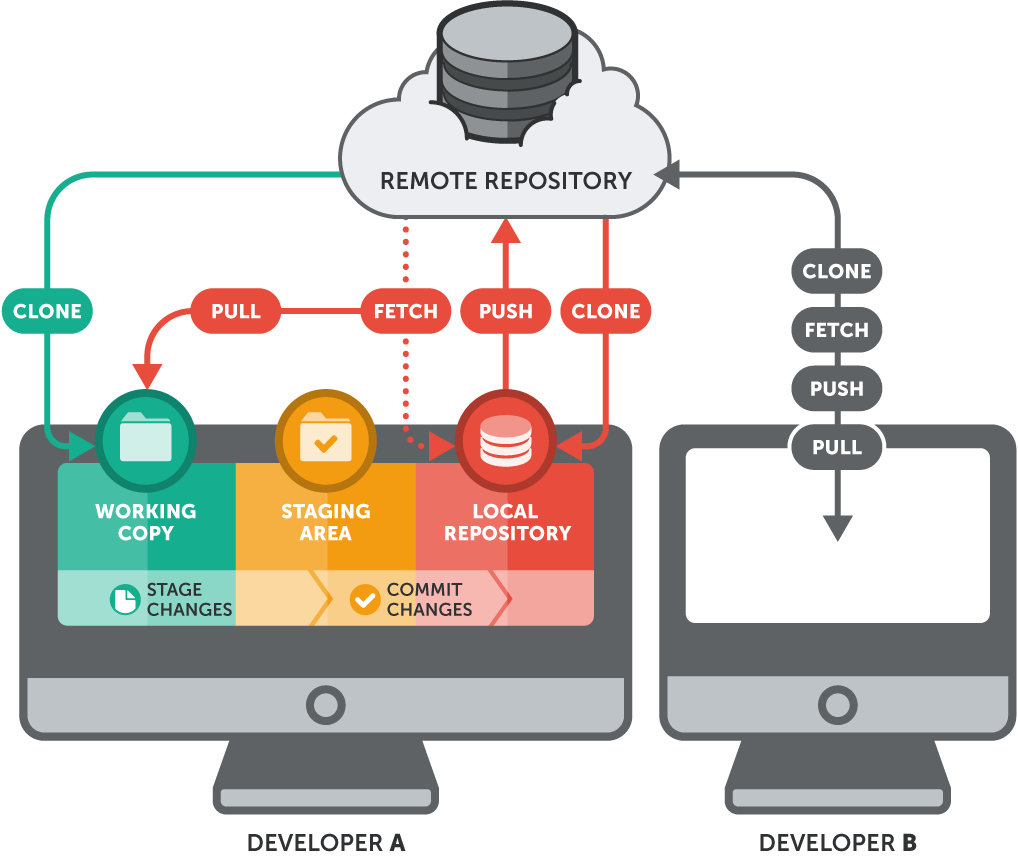
To push changes to a remote repository, use:
git push origin <branch-name>
Pulling Changes
To pull changes from a remote repository, use:
git pull
How to Pull Code from Git to Your System
Pulling code from a remote repository updates your local repository with the latest changes. Here’s how to do it:
Open Terminal: Open your terminal or command prompt.
Navigate to Your Project Directory: Use the
cdcommand to navigate to the directory of your Git repository:cd path/to/your/projectPull Changes: Use the
git pullcommand to pull changes from the remote repository:git pull origin <branch-name>
This command fetches and merges changes from the specified branch in the remote repository to your current branch.
Using Git in Visual Studio Code (VS Code)
Visual Studio Code (VS Code) provides an integrated source control management (SCM) tool that supports Git. Here's how you can push your code to Git from VS Code:
Step-by-Step Guide
Open Your Project in VS Code: Launch VS Code and open the folder containing your project.
Initialize a Git Repository: If you haven't already initialized a Git repository in your project, you can do so by opening the terminal in VS Code
(Ctrl+`` or` Cmd+) and running git init``.Open the Source Control View: Click on the Source Control icon in the Activity Bar on the side of VS Code, or press
Ctrl+Shift+G (or Cmd+Shift+Gon macOS).Stage Your Changes: In the Source Control view, you will see all your untracked and modified files. Click the
+icon next to the files you want to stage or use theStage All Changesbutton to stage all changes at once.Commit Your Changes: After staging your changes, enter a commit message in the input box at the top of the Source Control view and click the checkmark icon to commit your changes.
Add a Remote Repository: If you haven't added a remote repository yet, you can add one by opening the terminal and running:
git remote add origin https://github.com/username/repository.gitPush Your Changes: To push your changes to the remote repository, click on the ellipsis (...) in the Source Control view, select
Push, or use the command palette (Ctrl+Shift+PorCmd+Shift+P), typeGit: Push, and select it.Enter Credentials: If prompted, enter your GitHub username and password or personal access token
Sync Changes
VS Code also provides a Sync Changes option that combines git pull and git push into one command. To sync changes, click on the circular arrow icon in the Source Control view.
Common Mistakes and How to Avoid Them
Not Pulling Before Pushing
Mistake: Pushing changes to a remote repository without pulling the latest changes can cause conflicts.
Solution: Always pull changes from the remote repository before pushing your changes:
    git pull origin <branch-name>
    git push origin <branch-name>

Committing Large Files
Mistake: Committing large files can slow down the repository and cause issues with version control.
Solution: Use .gitignore to exclude large files from being tracked by Git. Create a .gitignore file in your repository and list the files or directories to ignore.
Not Writing Descriptive Commit Messages
Mistake: Using vague commit messages makes it difficult to understand the history of changes.
Solution: Write clear and descriptive commit messages that explain the purpose of the changes:
git commit -m "Add user authentication feature"
Ignoring Merge Conflicts
Mistake: Ignoring merge conflicts can lead to an unstable codebase.
Solution: Resolve merge conflicts carefully by reviewing the conflicting changes and deciding which changes to keep.
Using Force Push Incorrectly
Mistake: Using git push --force can overwrite changes in the remote repository.
Solution: Use git push --force-with-lease to ensure that you are not overwriting changes that you don't own:
git push --force-with-lease
Working on the Main Branch
Mistake: Making changes directly on the main branch can lead to an unstable codebase.
Solution: Create and use feature branches for new features or bug fixes, and merge them into the main branch after testing:
git checkout -b new-feature
Understanding Main and Master Branches
Main Branch
The main branch is the default branch in many Git repositories, especially in newer repositories. It serves as the primary branch where the source code for the project is kept in a deployable state.
Purpose: The main branch is often used for production-ready code. It’s where the stable version of your project resides.
Naming: The shift from
mastertomainreflects a movement towards more inclusive terminology.
Master Branch
The master branch has traditionally been the default branch in Git repositories. Like the main branch, it serves as the primary branch for stable, production-ready code.
Purpose: Historically, the master branch was used in the same way the main branch is used today, as the central branch for the stable codebase.
Naming: Many older repositories still use the master branch, but there is a growing trend to use the main branch instead for inclusivity reasons.
Transition from Master to Main
In recent years, there has been a shift towards using main as the default branch name instead of master. This change is part of a broader movement to adopt more inclusive language in technology.
Changing Default Branch Name: To rename the default branch from master to main in an existing repository, you can follow these steps:
Rename the branch locally:
git branch -m master mainPush the renamed branch and reset the upstream branch
git push -u origin mainChange the default branch in your repository settings on GitHub.
Delete the old master branch from the remote repository:
git push origin --delete master
Git vs GitHub: Understanding the Difference
While Git is a version control system, GitHub is a platform built around Git that provides hosting for Git repositories.
Git
Definition: Git is a distributed version control system used to track changes in source code during software development.
Usage: Installed locally on a developer's machine, Git manages repositories and tracks changes without needing a central server.
![Git vs GitHub: Git vs GitHub: Difference Between Git and GitHub [Updated]](https://www.simplilearn.com/ice9/free_resources_article_thumb/git_vs_github2.jpg)
GitHub
Definition: GitHub is a web-based hosting service for Git repositories.
Usage: Provides a platform for collaborative software development. Developers can host their Git repositories on GitHub, share code with others, and contribute to open-source projects.
Best Practices
Write Clear Commit Messages: Use meaningful and descriptive commit messages.
Commit Often: Make frequent commits to keep track of changes.
Use Branches: Create branches for new features and bug fixes.
Pull Before Push: Always pull changes from the remote repository before pushing your changes.
Conclusion
Git is an essential tool for modern software development. It allows developers to collaborate effectively, manage versions, and track changes. By mastering Git, you can improve your workflow, contribute to open source projects, and work seamlessly with other developers.
Using Git within Visual Studio Code makes the process even more intuitive, combining a powerful version control system with a versatile code editor. Whether you're just getting started or looking to deepen your understanding, this guide provides a comprehensive overview of Git's features and best practices.
Happy coding!
![]()